

 Installing a ceiling fan is very much in the realm of "do-it-yourself" projects, especially if you fancy yourself an intermediate or advanced DIYer. Putting the fan together is just a matter of following the directions and assembling all the parts. The only tricky part is wiring and mounting the fan, but the newest models make this easier than ever before. "Many fans now contain 'quick-connect' components that make them much easier to install," says Joseph A. Rey-Barreau, director of education at the American Lighting Association.
Always follow the manufacturer's instructions first when installing your fan, but you can use these basic guidelines from the DIY Network, too:
1. Safety first! Before you do anything, get thee to your breaker box and turn off the power at the switch that supplies electricity to the fixture where you'll be working.
2. Attach the fan's mounting bracket to the outlet box using the screws and lock-washers provided, pulling the electrical wires through the center hole of the bracket.
3. Study the wiring diagrams and existing wiring before you begin hooking up the fan. The standard set up: the black wire is the "hot" wire for the fan, the blue wire is the "hot wire" for the light kit, and the green wire is the ground (Always check the instructions that go with your specific fan.)
4. While connecting the wires, have someone support the fan for you.
5. Attach the canopy to the housing, and carefully pull the wires through to make the connection.
6. Be certain to cover all exposed wire-connections with the wire-nuts provided before pushing them into the electrical box.
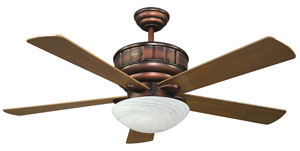
7. Install the fan blades, following the manufacturer's instructions.
8. Now you can hook up the light kit. Remove the cover plate and plug.
9. Feed the wires through the hole, and attach the cover plate to the light kit, securing the cover tightly so that it can't come loose from vibrations.
10. Connect the wires according to the manufacturer's instructions and use wire-nuts and electrical tape to make sure that nothing will come loose when the fan is operating.
11. Push the wires into the switch-housing and attach the light kit.
12. Install light bulbs.
13. You're done! Now turn the power back on at the breaker box, and test your fan and light.
A Light for a Fan — If you're replacing a light with a ceiling fan, though, that's where things can get a little tricky. That's because a fan needs a sturdy mounting system that the light did not.
Enter the fan support bar or brace. This adjustable bar just slips into the hole where the existing light was wired into the ceiling. Then, twisting the center of the bar makes it expand until it spans between two ceiling joists, providing a sturdy mounting place for the fan.
After that, you can just mount an electrical junction box to the support bar, and proceed with the fan installation as usual.
Hot Product! Reiker Room Conditioner |
 Most ceiling fans just push air around the room. Not that there's anything wrong with that, but the Reiker Corporation has taken the common ceiling fan and done it one better by building in a heater and creating the Reiker Room Conditioner. Most ceiling fans just push air around the room. Not that there's anything wrong with that, but the Reiker Corporation has taken the common ceiling fan and done it one better by building in a heater and creating the Reiker Room Conditioner.The Room Conditioner delivers cool air in the summer just like a standard ceiling fan, but where it really shines is in the winter, when it can fill a room with warm air. And because it costs just pennies to run, it acts as a zone heater, helping you save money on your heating bill. The newest models even come with a remote control, allowing you to control the fan, light, and heat with the click of a button. The Reiker Room Conditioner sells for $300 to $375. For more information, visit BuyReiker.com or call 866-473-4537. |