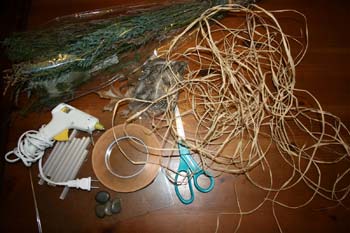
—Glue gun and glue sticks.
|
|
| Be sure to clean the glass on both sides before you start. Also lay down newspaper or a garbage bag over your work area or clean the surface thoroughly. You’ll want to minimize fingerprints on the glass, especially the side that will end up on the inside. I’d also recommend wearing work gloves if you have them. This will cut down on the finger smears on the glass and will also protect your fingers from cuts. |
|
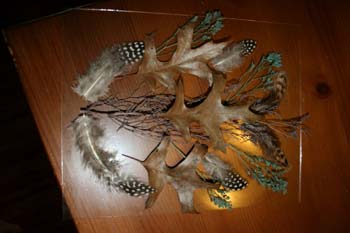 On one of the pieces of glass, start playing around with your design. If you’re stumped, start with your focal point (I selected a dried flower and a leaf) in the center of the piece and then add materials on either side, creating a symmetrical design. Play around with how the items are layered on top of one another and see what looks best to you. On one of the pieces of glass, start playing around with your design. If you’re stumped, start with your focal point (I selected a dried flower and a leaf) in the center of the piece and then add materials on either side, creating a symmetrical design. Play around with how the items are layered on top of one another and see what looks best to you. |
|
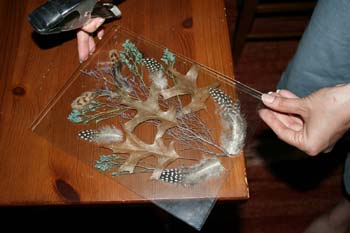 Once you’re satisfied with your design, try putting the other piece of glass on top. You may need to re-adjust your design if you find it’s too thick and the pieces of glass don’t easily meet. Once you’re satisfied with your design, try putting the other piece of glass on top. You may need to re-adjust your design if you find it’s too thick and the pieces of glass don’t easily meet. Use clamps or a friend with strong hands to hole the pieces of glass together. Make sure they are aligned. |
|
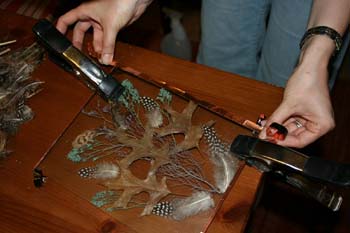 Now you’re ready to use the copper foil tape to join the pieces of glass together. I started on the front side, pressing the tape down firmly onto the glass. Make sure you’re leaving some tape at the top to wrap it around the sides of the glass. Now you’re ready to use the copper foil tape to join the pieces of glass together. I started on the front side, pressing the tape down firmly onto the glass. Make sure you’re leaving some tape at the top to wrap it around the sides of the glass. One roll of copper foil tape will provide you with plenty of material, so don’t be stingy with it. A lot of times, I turned the suncatcher over and repeated the process on the other side, so there were two thicknesses holding the pieces of glass together. |
|
 At the corners, leave a little excess tape. I did the corners last and just made sure they looked good from the front, trimming the extra. A small warning: Different widths of copper foil tape have different colored backings. I used one with black backing, so I needed to make sure that the backing didn’t show from the front. At the corners, leave a little excess tape. I did the corners last and just made sure they looked good from the front, trimming the extra. A small warning: Different widths of copper foil tape have different colored backings. I used one with black backing, so I needed to make sure that the backing didn’t show from the front. |
|
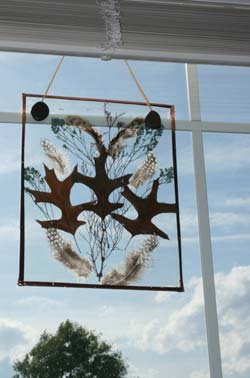 After all four sides are taped, you’re just about done. All you need to do now is add a hanger. Copper wire would be a cool touch, but I went for natural materials that I already hand on hand. After all four sides are taped, you’re just about done. All you need to do now is add a hanger. Copper wire would be a cool touch, but I went for natural materials that I already hand on hand. Using a glue gun, I adhered a piece of raffia to the front of the suncatcher’s corners. To hide the glue, I used two small river rocks as “buttons,” again using the glue gun to fasten the rocks to the front of the suncatcher. You can use anything you’d like. Twine would be a neat rustic addition, too. After the glue is set, you can hang the suncatcher from any window in your house using the suction cup hanger. It’s the perfect way to add a little rustic flair to your log home’s windows. |
|